How to Style Your SimplePractice Button So It Actually Matches Your Squarespace Site
Let’s be real—that orange button’s not it
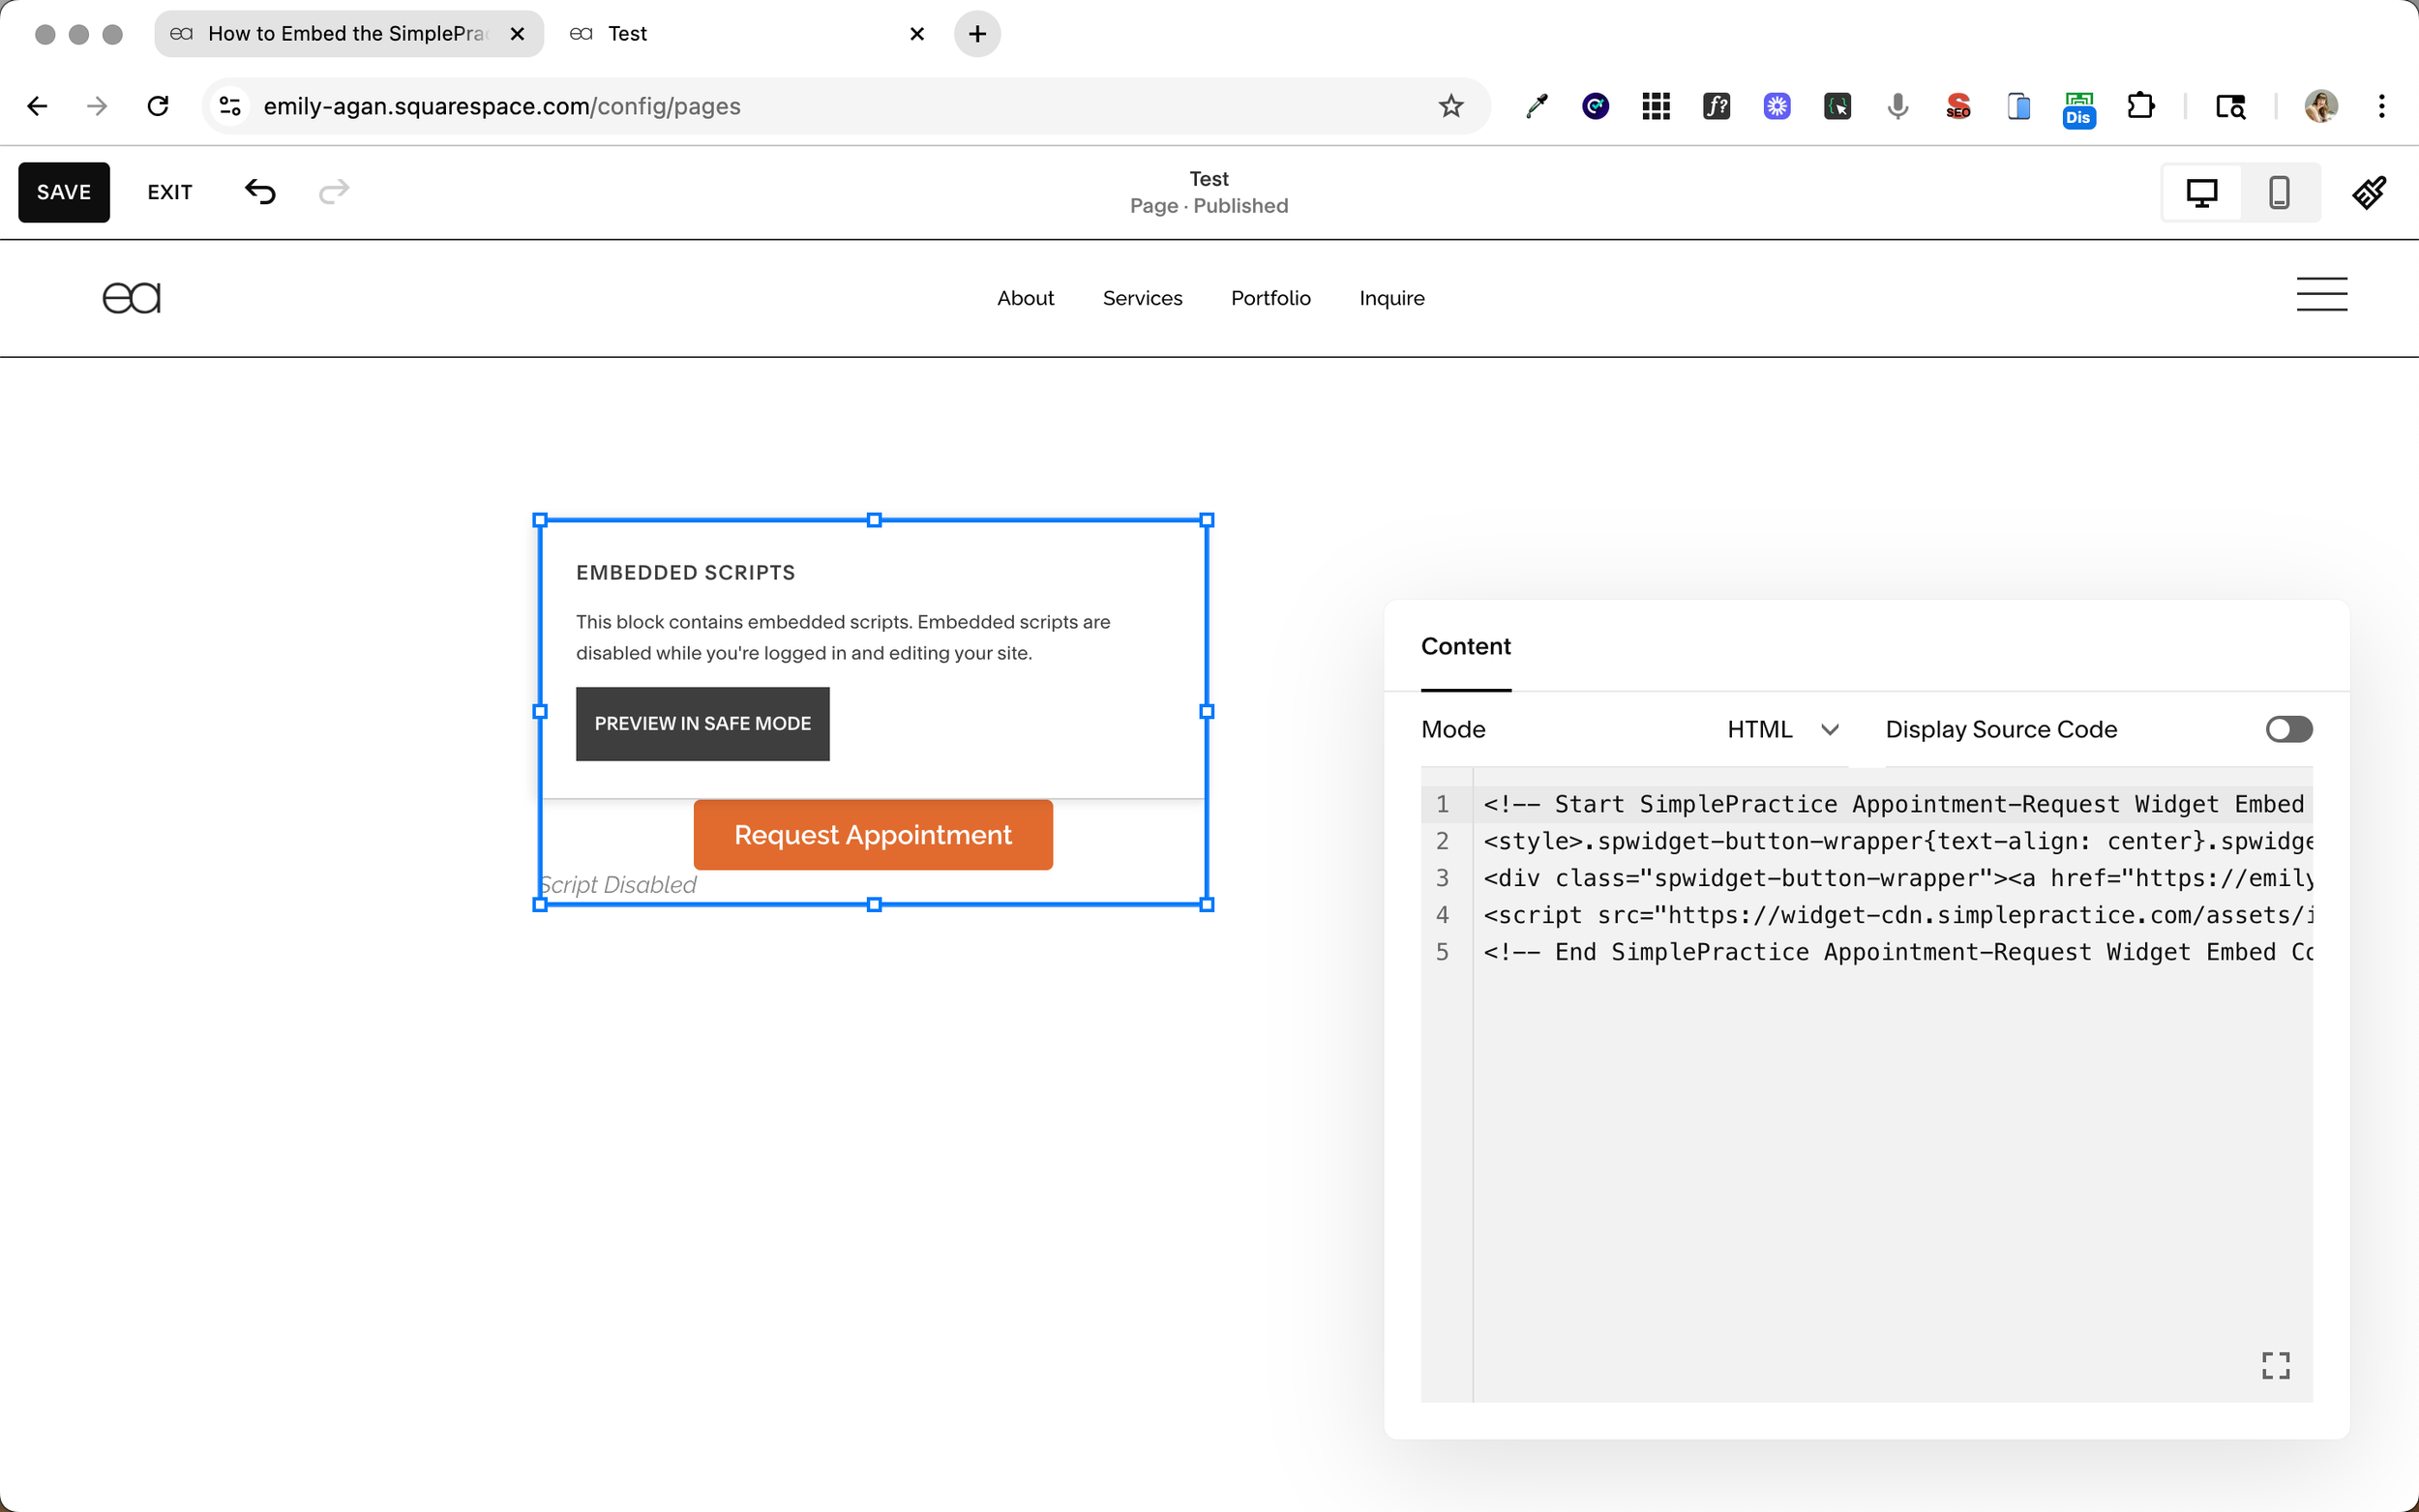
If you’ve already embedded the SimplePractice scheduler on your site, you’ve probably seen the default button it comes with. It works, but it’s orange. And unless your brand colors are built around that exact shade (unlikely), it just feels out of place.
It’s a small thing, but these details matter. When everything on your site matches—your fonts, your colors, your buttons—it builds trust. It helps people settle in. They’re not asking “Is this the right next step?” because the site is already guiding them.
This post will walk you through how to make that “Request Appointment” button actually match the rest of your Squarespace design. I’ll show you exactly what to change in the embed code and what not to mess with so it still works the way it’s supposed to.
And if you haven’t embedded the scheduler yet, no problem. I’ve got a post that walks you through how to set it up: How to Embed the SimplePractice Appointment Request Widget to Your Squarespace Site. Start there, then come back once you’re ready to clean it up.
Step 1: Grab the Widget Code
You’ll find it in your SimplePractice account:
Go to Settings > Scheduling and Inquiries > Appointment-request widget
Click Copy Code
Then head to your Squarespace site and paste that code into a Code Block wherever you want the scheduler to appear
Step 2: Swap the Styling So It Matches
By default, SimplePractice adds a bunch of styling to the button: color, spacing, fonts, all of it. That’s why it doesn’t look like your other site buttons.
You can fix this with two quick edits to the embed code.
First, delete the built-in styling.
Look for this part near the top of your code:
<style>.spwidget-button-wrapper { ... }</style>
Delete that entire <style> block, including the tags themselves.
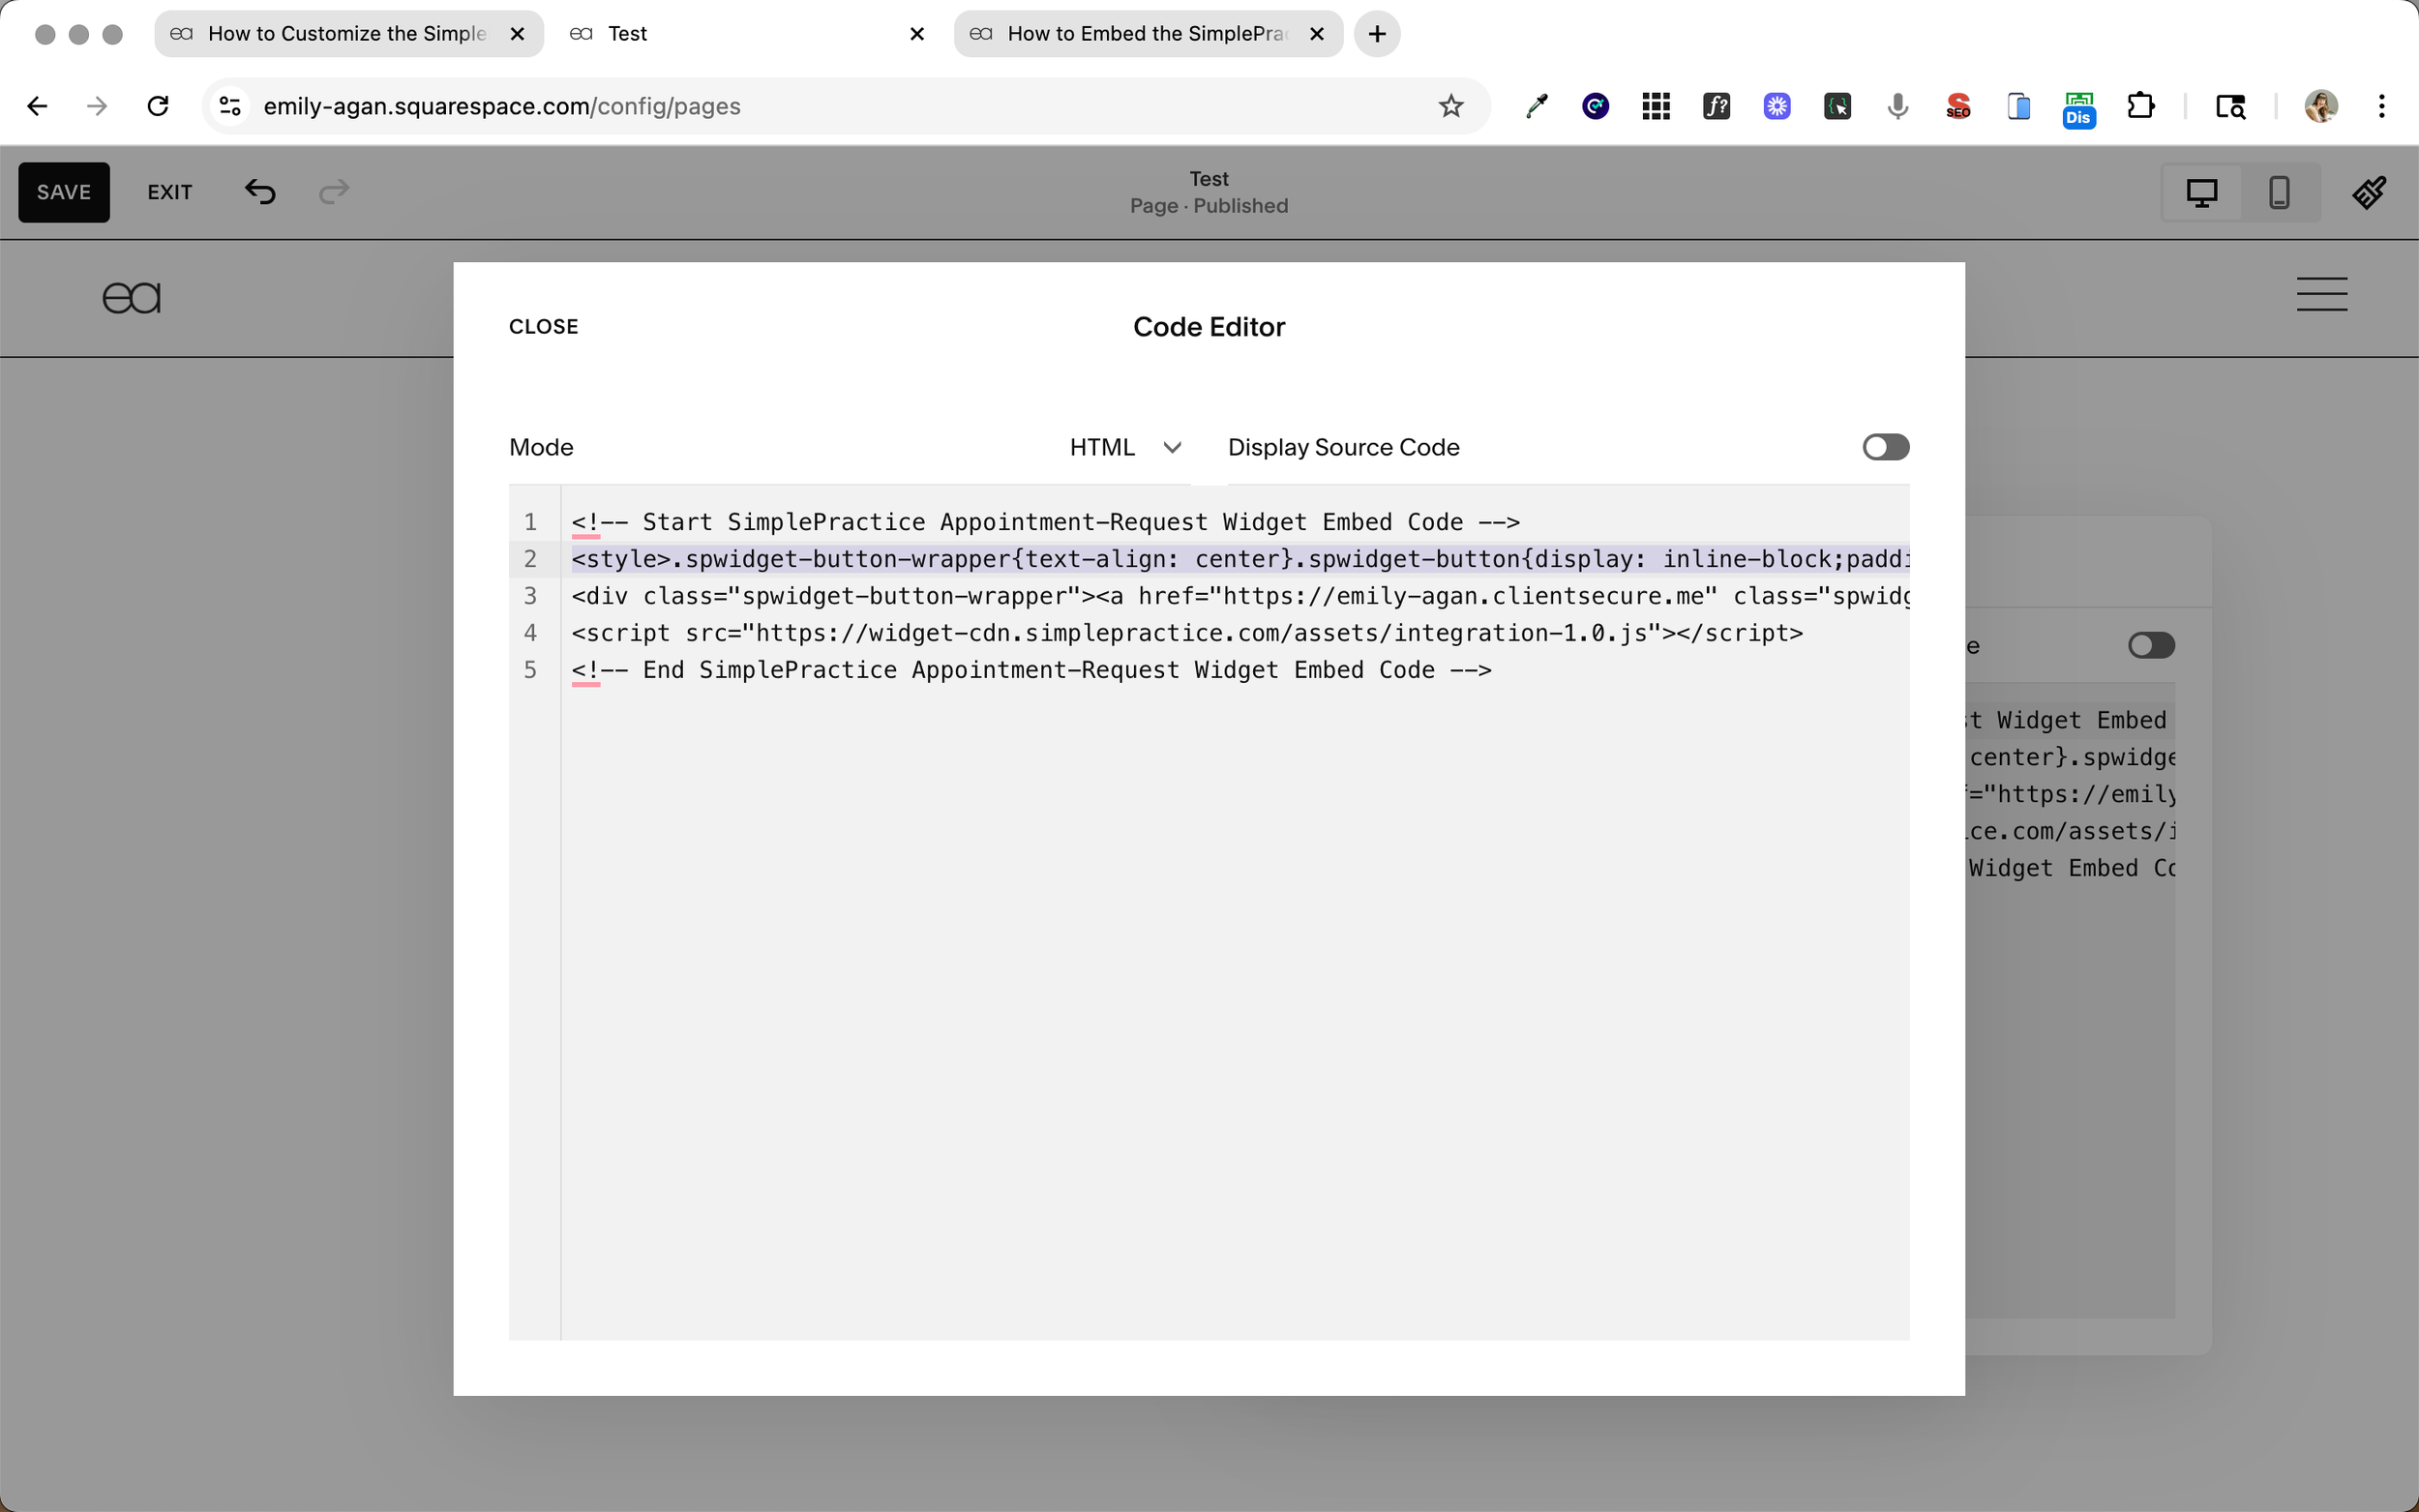
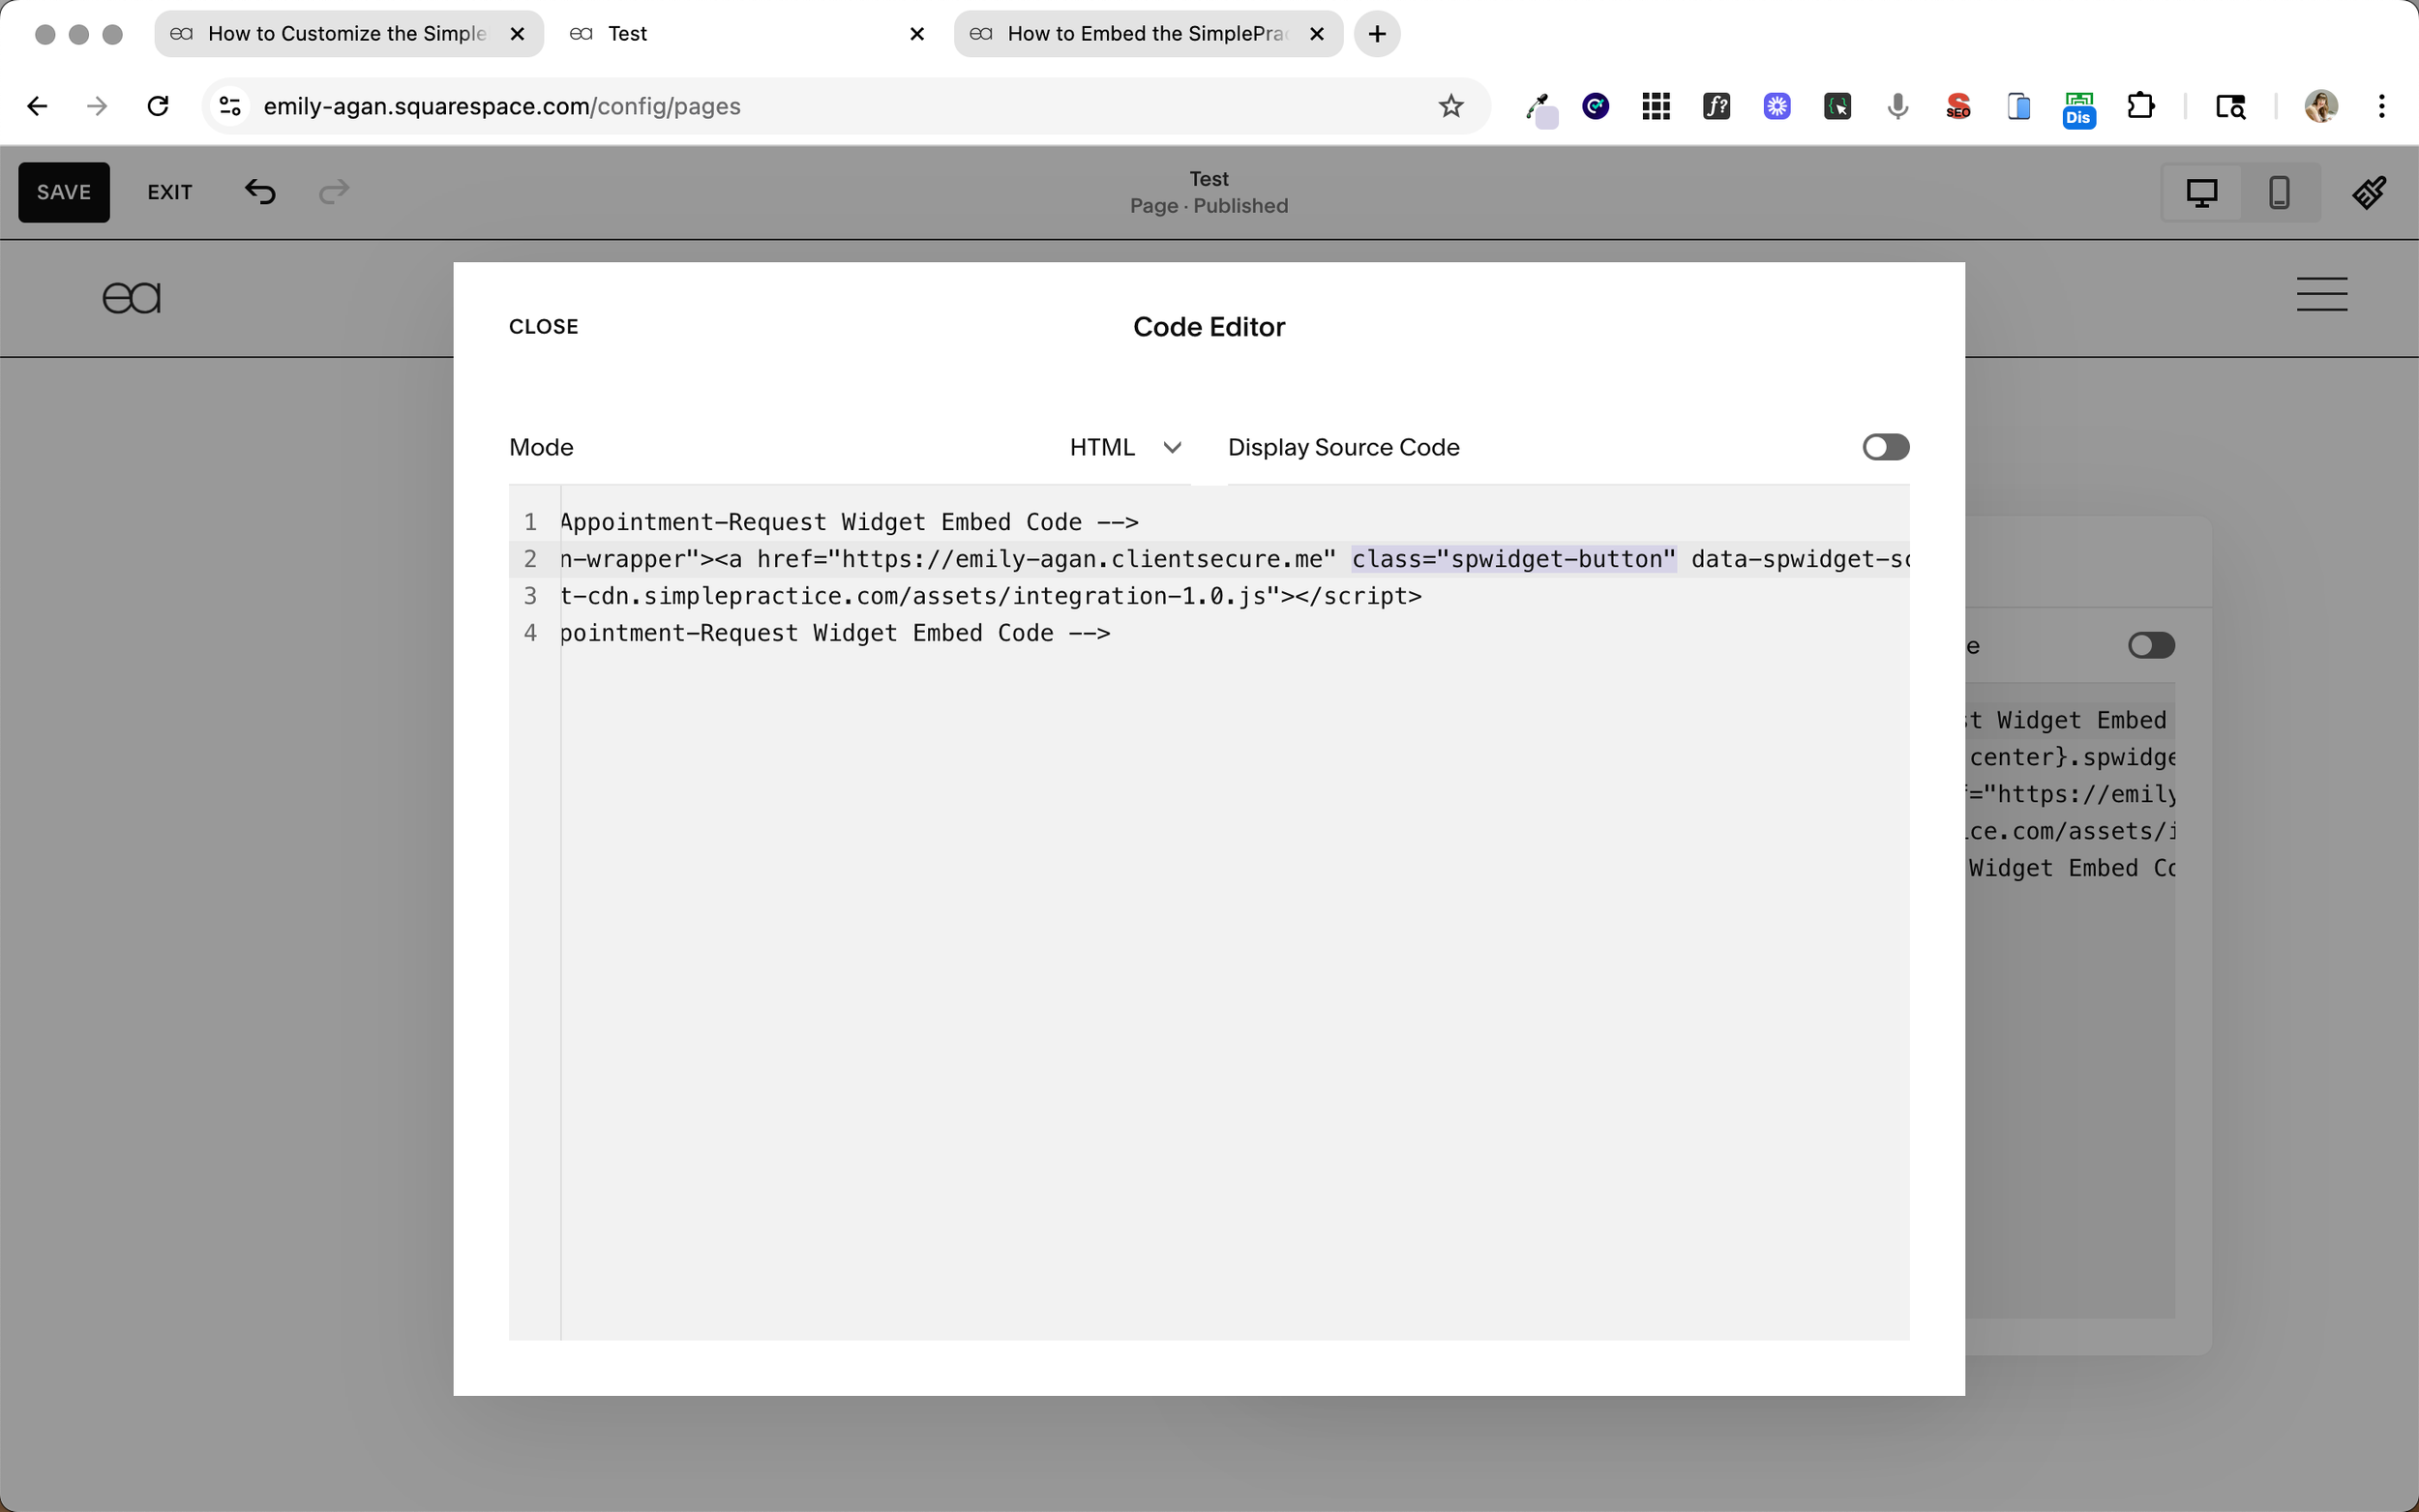
Then, update the button class.
Find the line that starts like this:
<a href="..." class="spwidget-button" ...>
Replace just the class="..." part with this:
class="sqs-block-button-element--medium sqs-button-element--primary sqs-block-button-element"
Don’t change anything else. Keep all the data attributes and your own booking link exactly as they are. You’re only swapping out the styling.
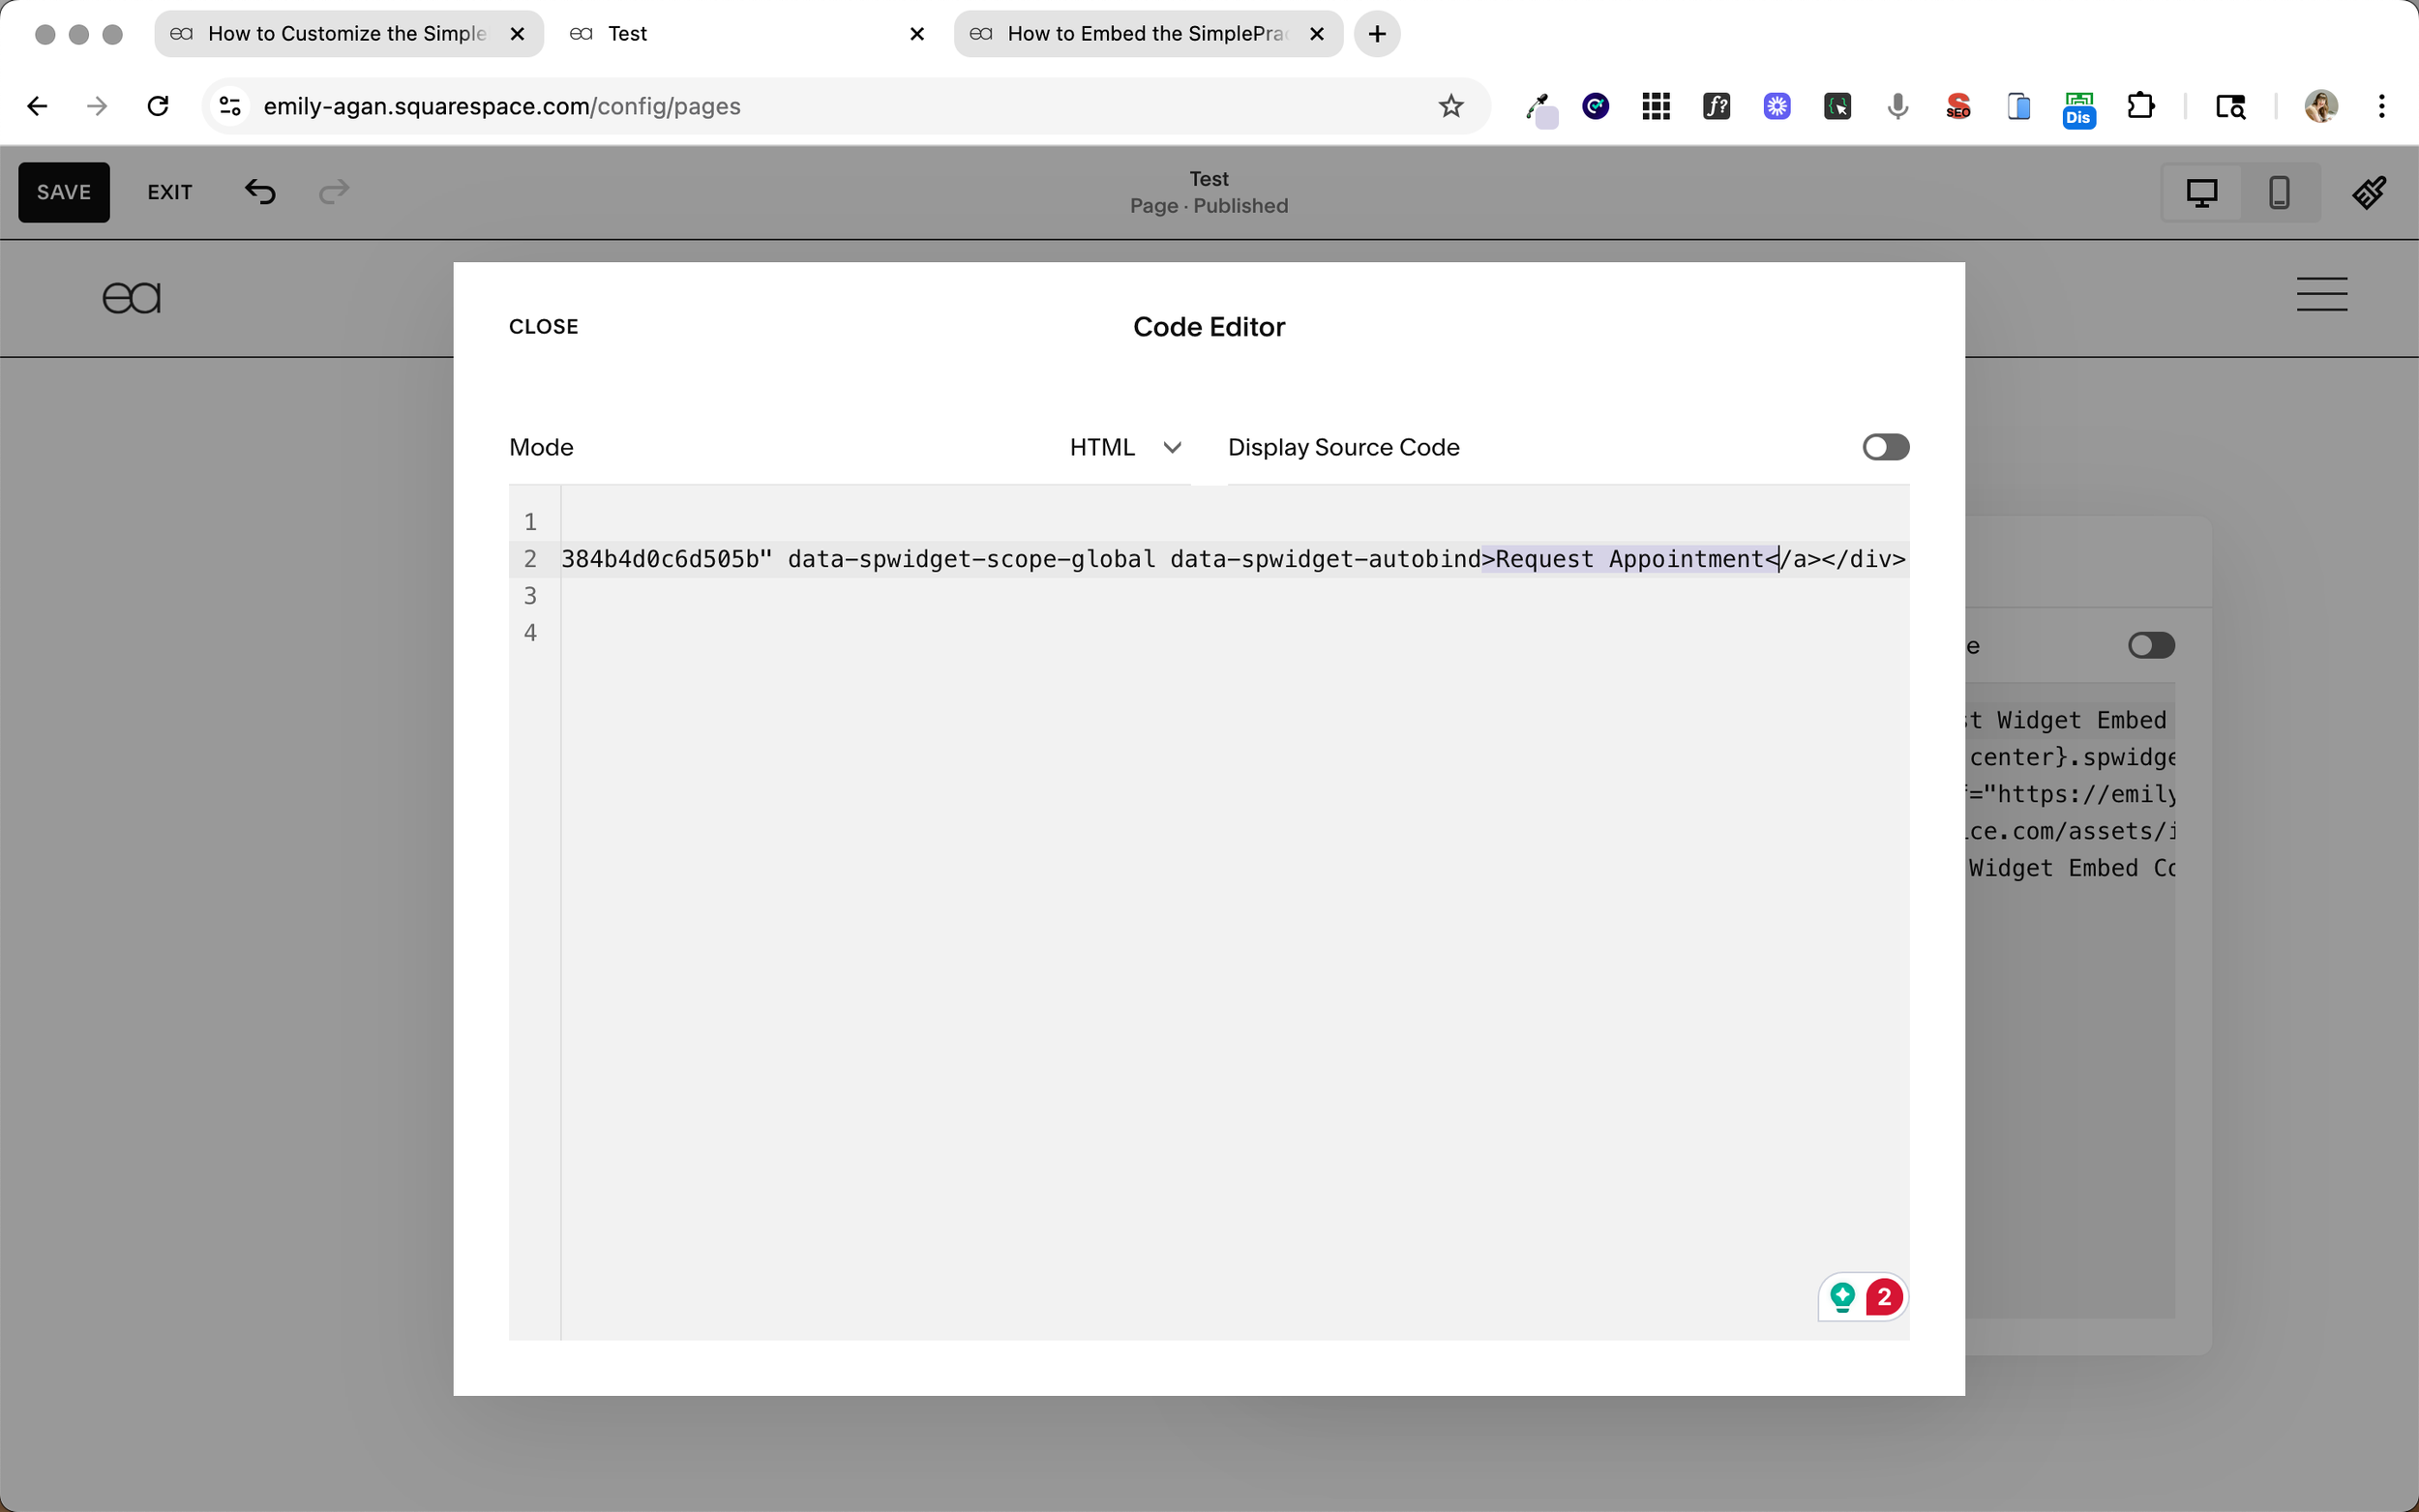
Step 3: Change the Button Text
The default says “Request Appointment,” but you can change that to something that sounds more like you.
Just find this part of the code:
>Request Appointment<
Swap out the >Request Appointment< between the arrows. A few options:
Book a Free Consultation
Free Consultation Call
Schedule a Consult
Get Started
Step 4: Optional – Clean Up Extra Spacing
Sometimes the Code Block adds more space than you want around the button. Totally optional, but if you want to tighten things up, you can paste this into Design > Custom CSS:
html.squarespace-damask .sqs-blockStatus,
.sqs-block .removed-script {
  display: none;
}
Final Tip
If something breaks or you want to start over, just go back to SimplePractice, re-copy the Appointment-request widget code, and replace it on your site.
And if you’re still getting things set up, you can find the full walkthrough for creating and embedding your scheduler How to Embed the SimplePractice Appointment Request Widget to Your Squarespace Site.
Want Help Making Your Therapy Website Look and Feel More Like You?
If messing with code sounds annoying—or if this whole thing made you realize your site just doesn’t feel like you—I can help.
You can book a 30-minute 1:1 Support Call. It’s a screen-shared session where I walk you through the exact changes you need to make and answer your questions as we go. You’re in the driver’s seat. I’m here to guide.
And if your site needs more than a quick fix, my One-Page Website package might be a better fit. It’s a done-for-you experience where we build something that actually works for your practice, start to finish.